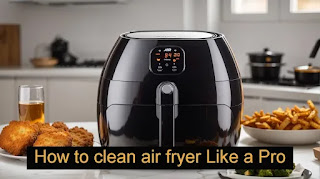
How to Clean Your Air Fryer Like a Pro: A Simple Guide
Hey there, air fryer aficionados! We know that air fryers are amazing for cooking up crispy, delicious dishes with less oil. But you know what's not so amazing? The cleanup. Don't worry, though, we've got your back. In this super-friendly and easy-to-follow guide, we're going to show you how to clean your air fryer like a pro, so you can enjoy your guilt-free fries and nuggets without the hassle.
What You'll Need:
Your trusty, slightly messy air fryer (of course!)
Warm, soapy water
A soft sponge or cloth
A small brush or toothbrush
Some patience and a can-do attitude
Step 1: Safety First, Unplug!
Before you dive into the cleaning frenzy, make sure your air fryer is unplugged and completely cooled down. Safety always comes first, right?
Step 2: The Easy Part - The Basket and Pan
Now for the fun stuff. Remove the basket and pan from your air fryer. These are the parts that usually get the most action and, consequently, the most grime. Give them a good shake to remove any loose crumbs.
Next, wash them with warm, soapy water. A soft sponge or cloth should do the trick. Avoid abrasive scrubbers or steel wool, as they can damage the nonstick coating.
Step 3: The Tricky Bits - Inside the Air Fryer
Time to tackle the inside of your air fryer. Be gentle; it's a sensitive soul.
Use a damp cloth or sponge to wipe down the heating element and the walls of the fryer. If you encounter stubborn, stuck-on gunk, a small brush or toothbrush can help. But remember, gentle strokes are the way to go.
Also Read: What is an air fryer ,benefits, How to use
Step 4: The Hidden Treasure - The Heating Element
Now, for the part that often gets overlooked—the heating element. This is where things get a bit more delicate.
First, ensure your air fryer is completely dry. Moisture and electrical parts don't mix well. Use a slightly damp cloth to gently wipe down the heating element. Avoid using excessive water, and never submerge this part in water.
Step 5: Don't Forget the Exterior
Give the exterior of your air fryer some love too. A quick wipe with a damp cloth will keep it looking spiffy.
Step 6: Reassemble and You're Done
After everything is clean and dry, put your air fryer back together. Plug it in, and you're ready for your next crispy adventure!
Pro Tips:
If you have removable, dishwasher-safe parts, check your user manual for cleaning instructions. Some air fryers make cleanup even easier.
If there are stubborn odors lingering, try placing a small bowl of white vinegar inside your air fryer and running it at a low temperature for a few minutes. This can help neutralize odors.
Regular cleaning is key. Don't let gunk build up, or it'll become a real chore. A quick wipe after each use can save you a lot of scrubbing later.
And there you have it, folks! Cleaning your air fryer doesn't have to be a dreaded task. With a little know-how and a friendly attitude, you'll have your air fryer looking and smelling fresh in no time. So go ahead, whip up those crispy treats, and enjoy every bite, knowing that cleanup is a breeze. Happy air frying! 🍟🍗🌮
